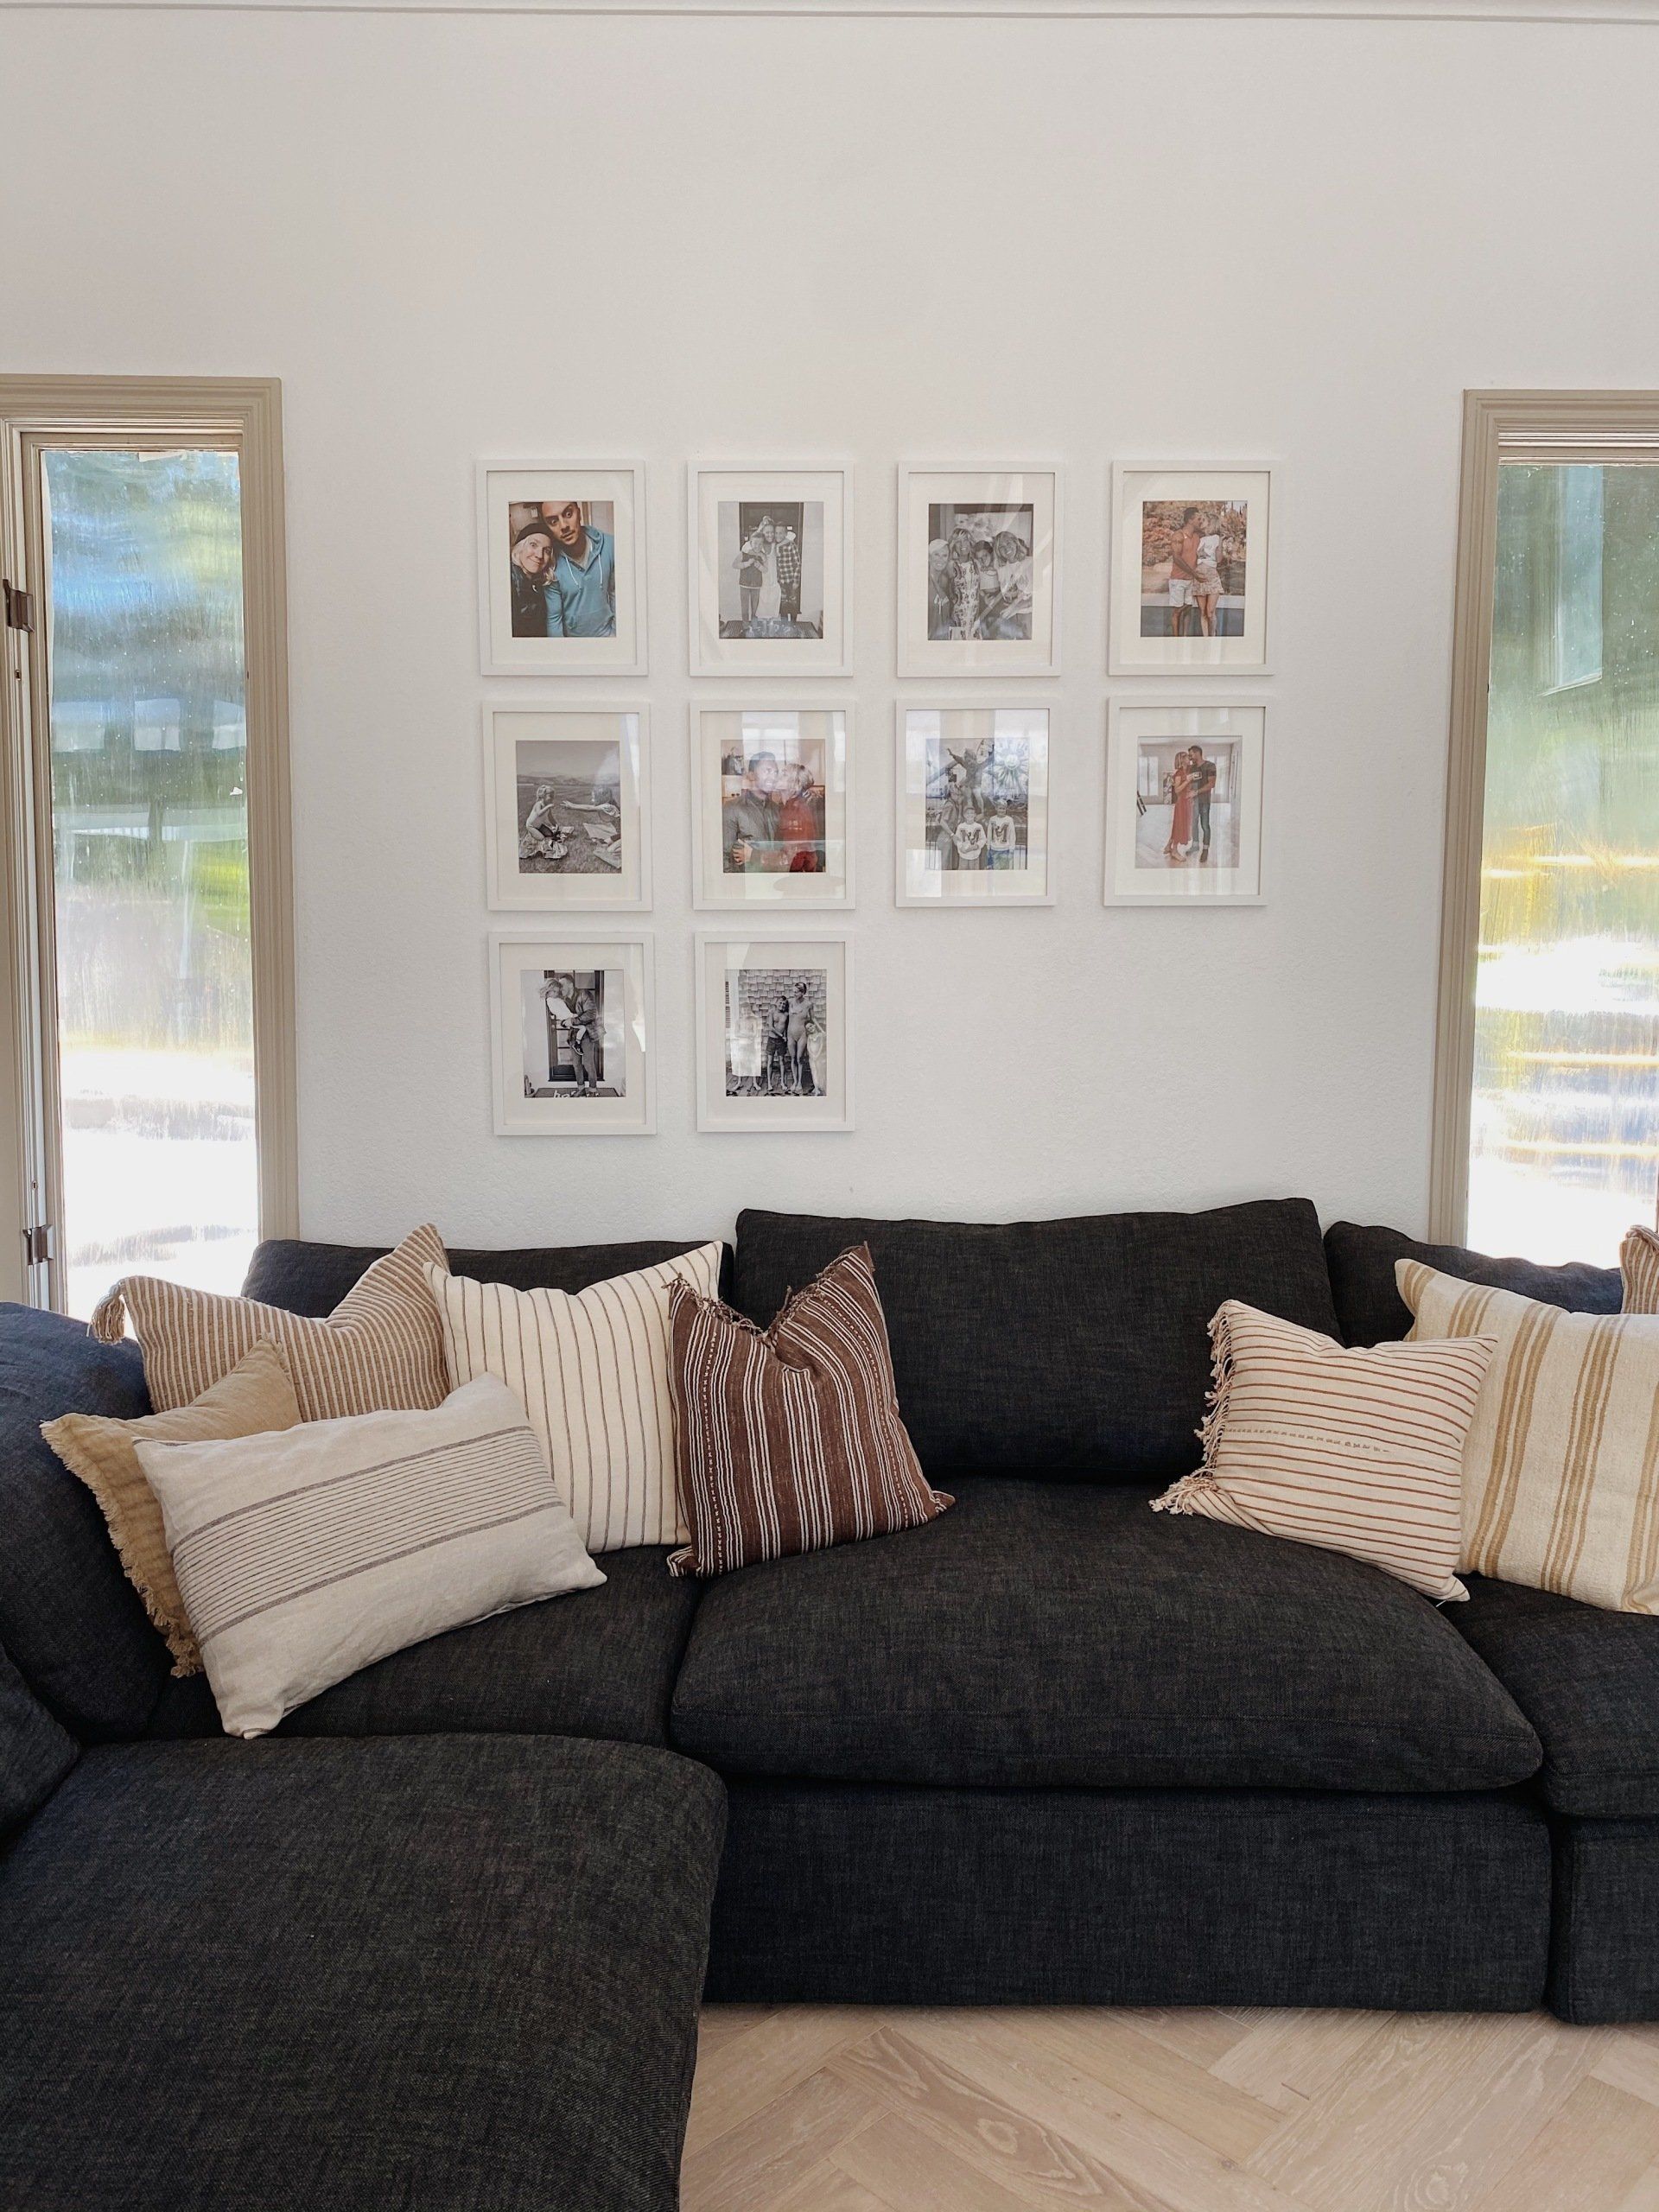
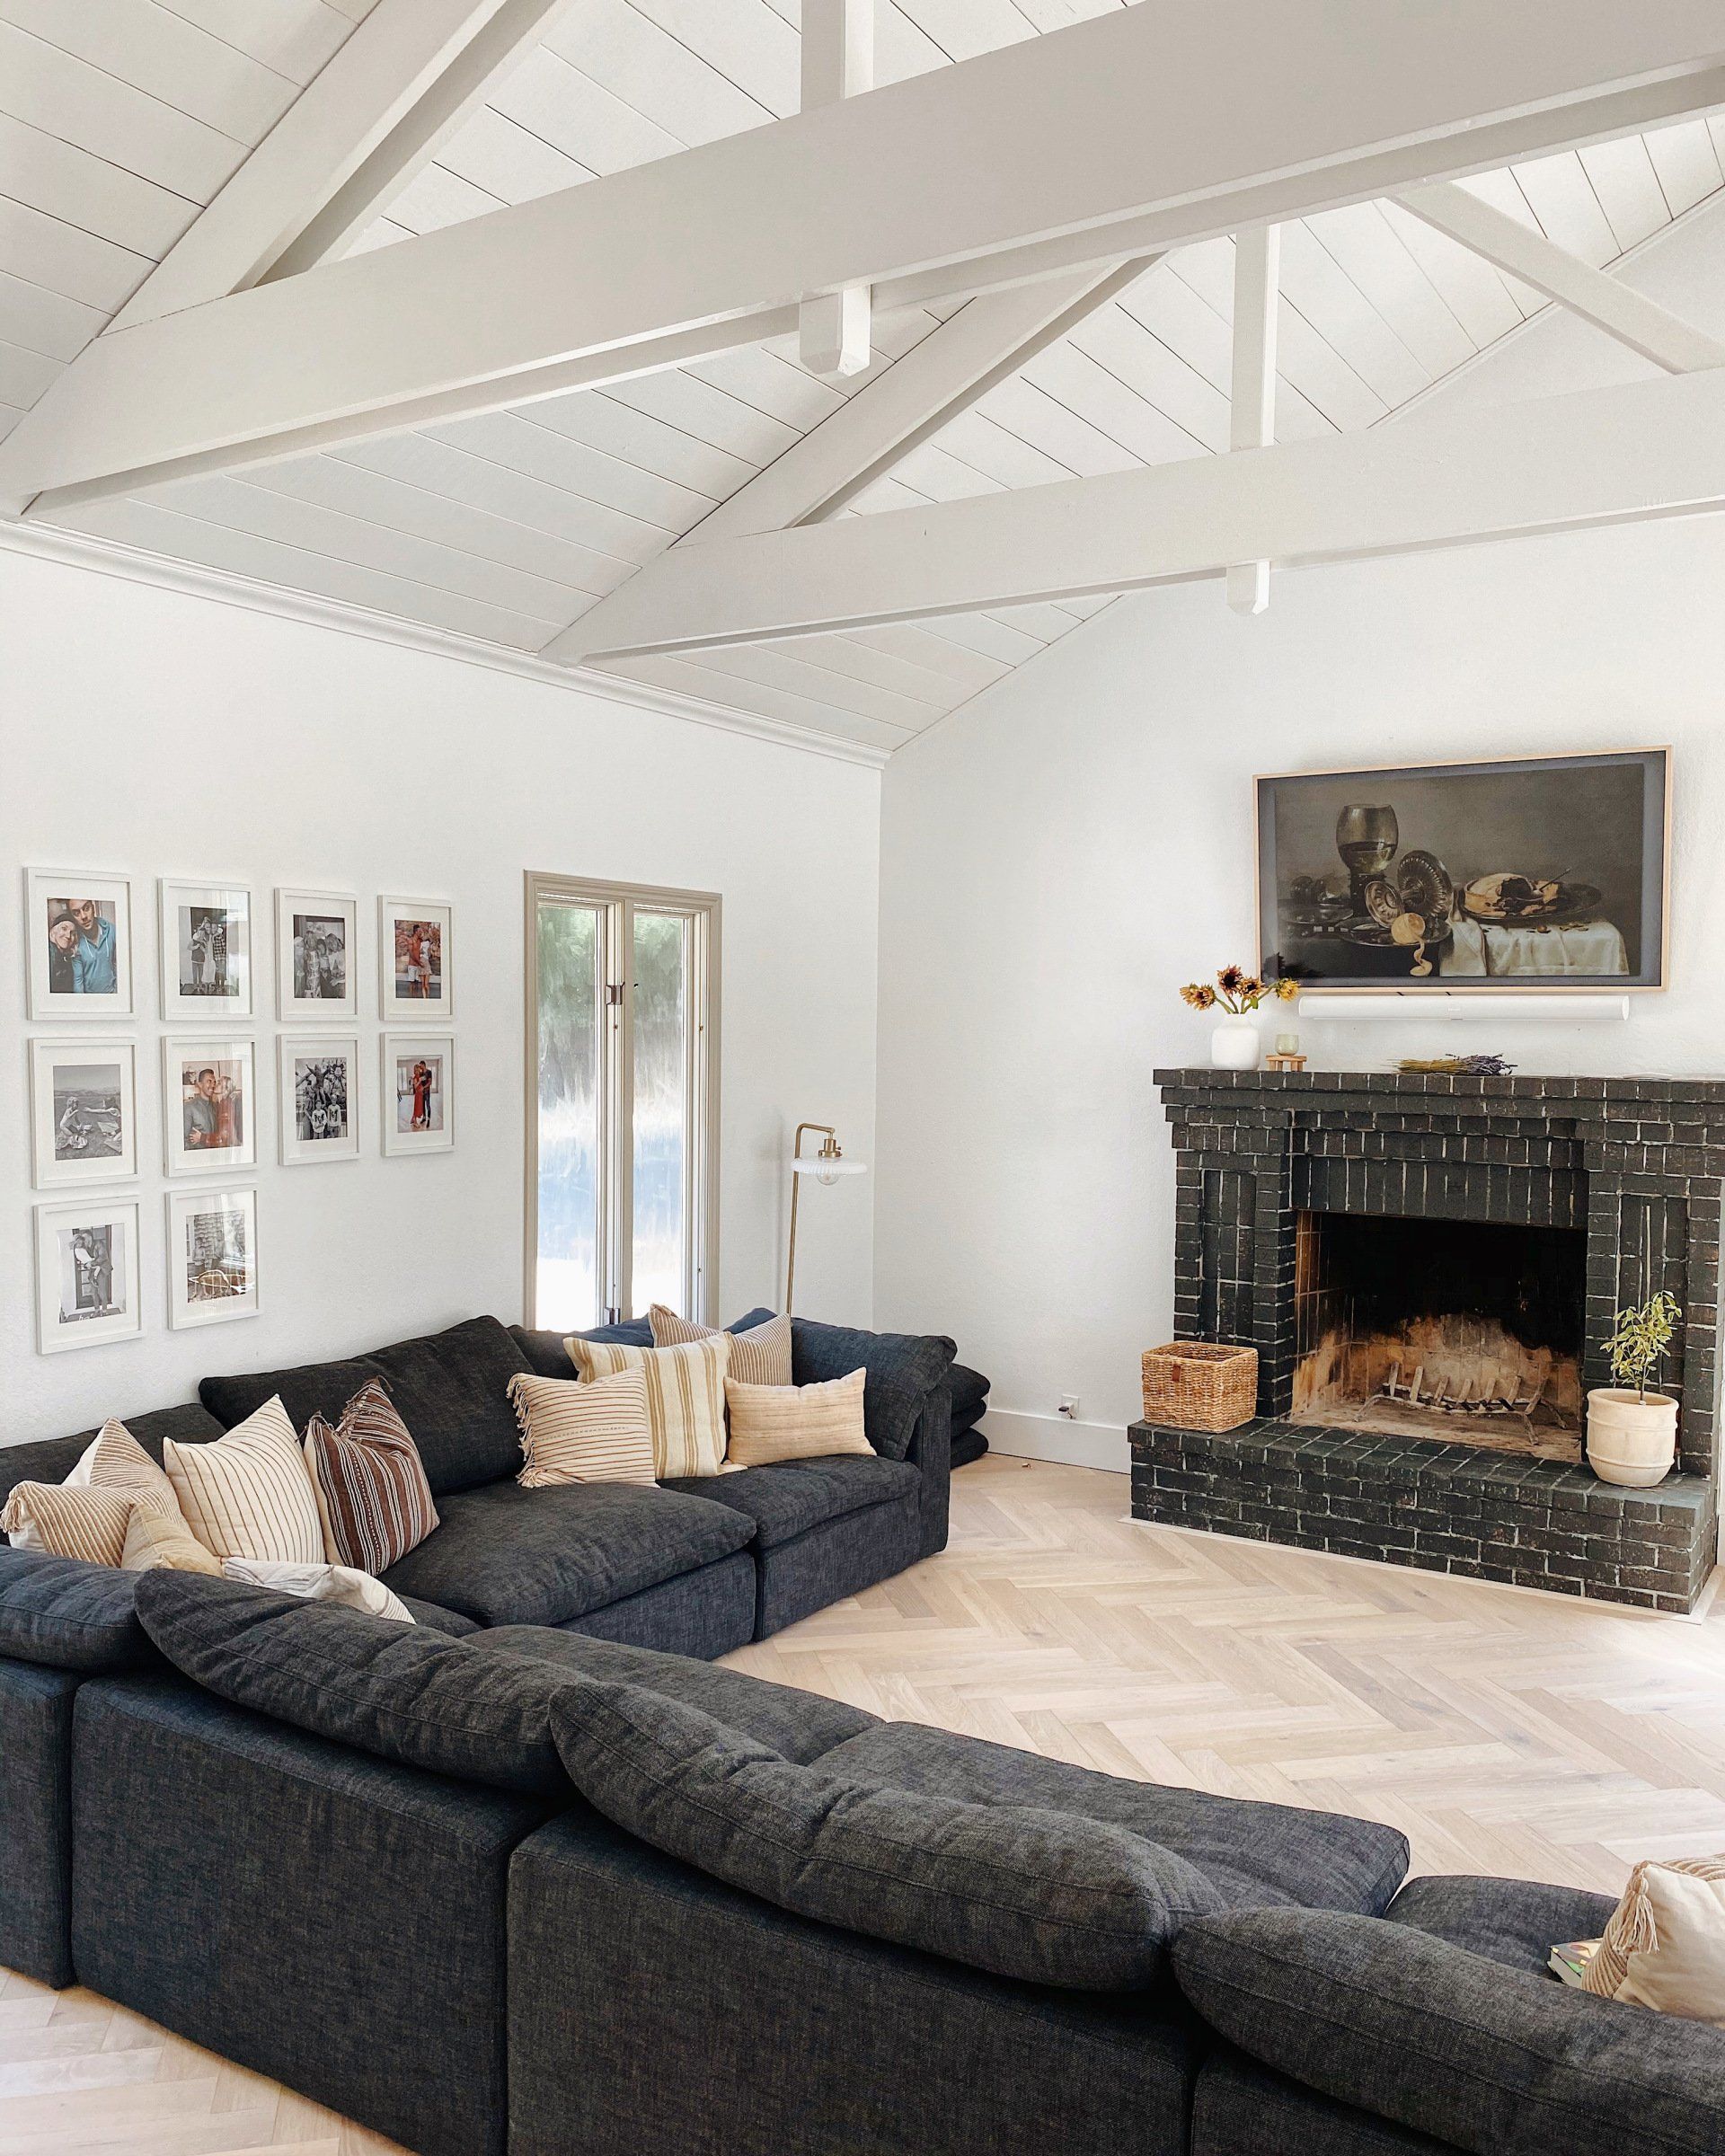
Gallery Wall: How To
arrowsandbow9 • July 16, 2020
Gallery Wall: How To
I love, love, love doing gallery walls - obviously I love our family and LOVE having family photos up…but gallery walls
are great because they allow you to showcase special, fun pictures but without small frames sitting everywhere which
to me, is stuff - so the walls keep the pictures on display, but without needing tables, etc to set the frames on.
Plus it’s an inexpensive way to update your home every once in a while - new prints, fresh gallery wall! Woo!
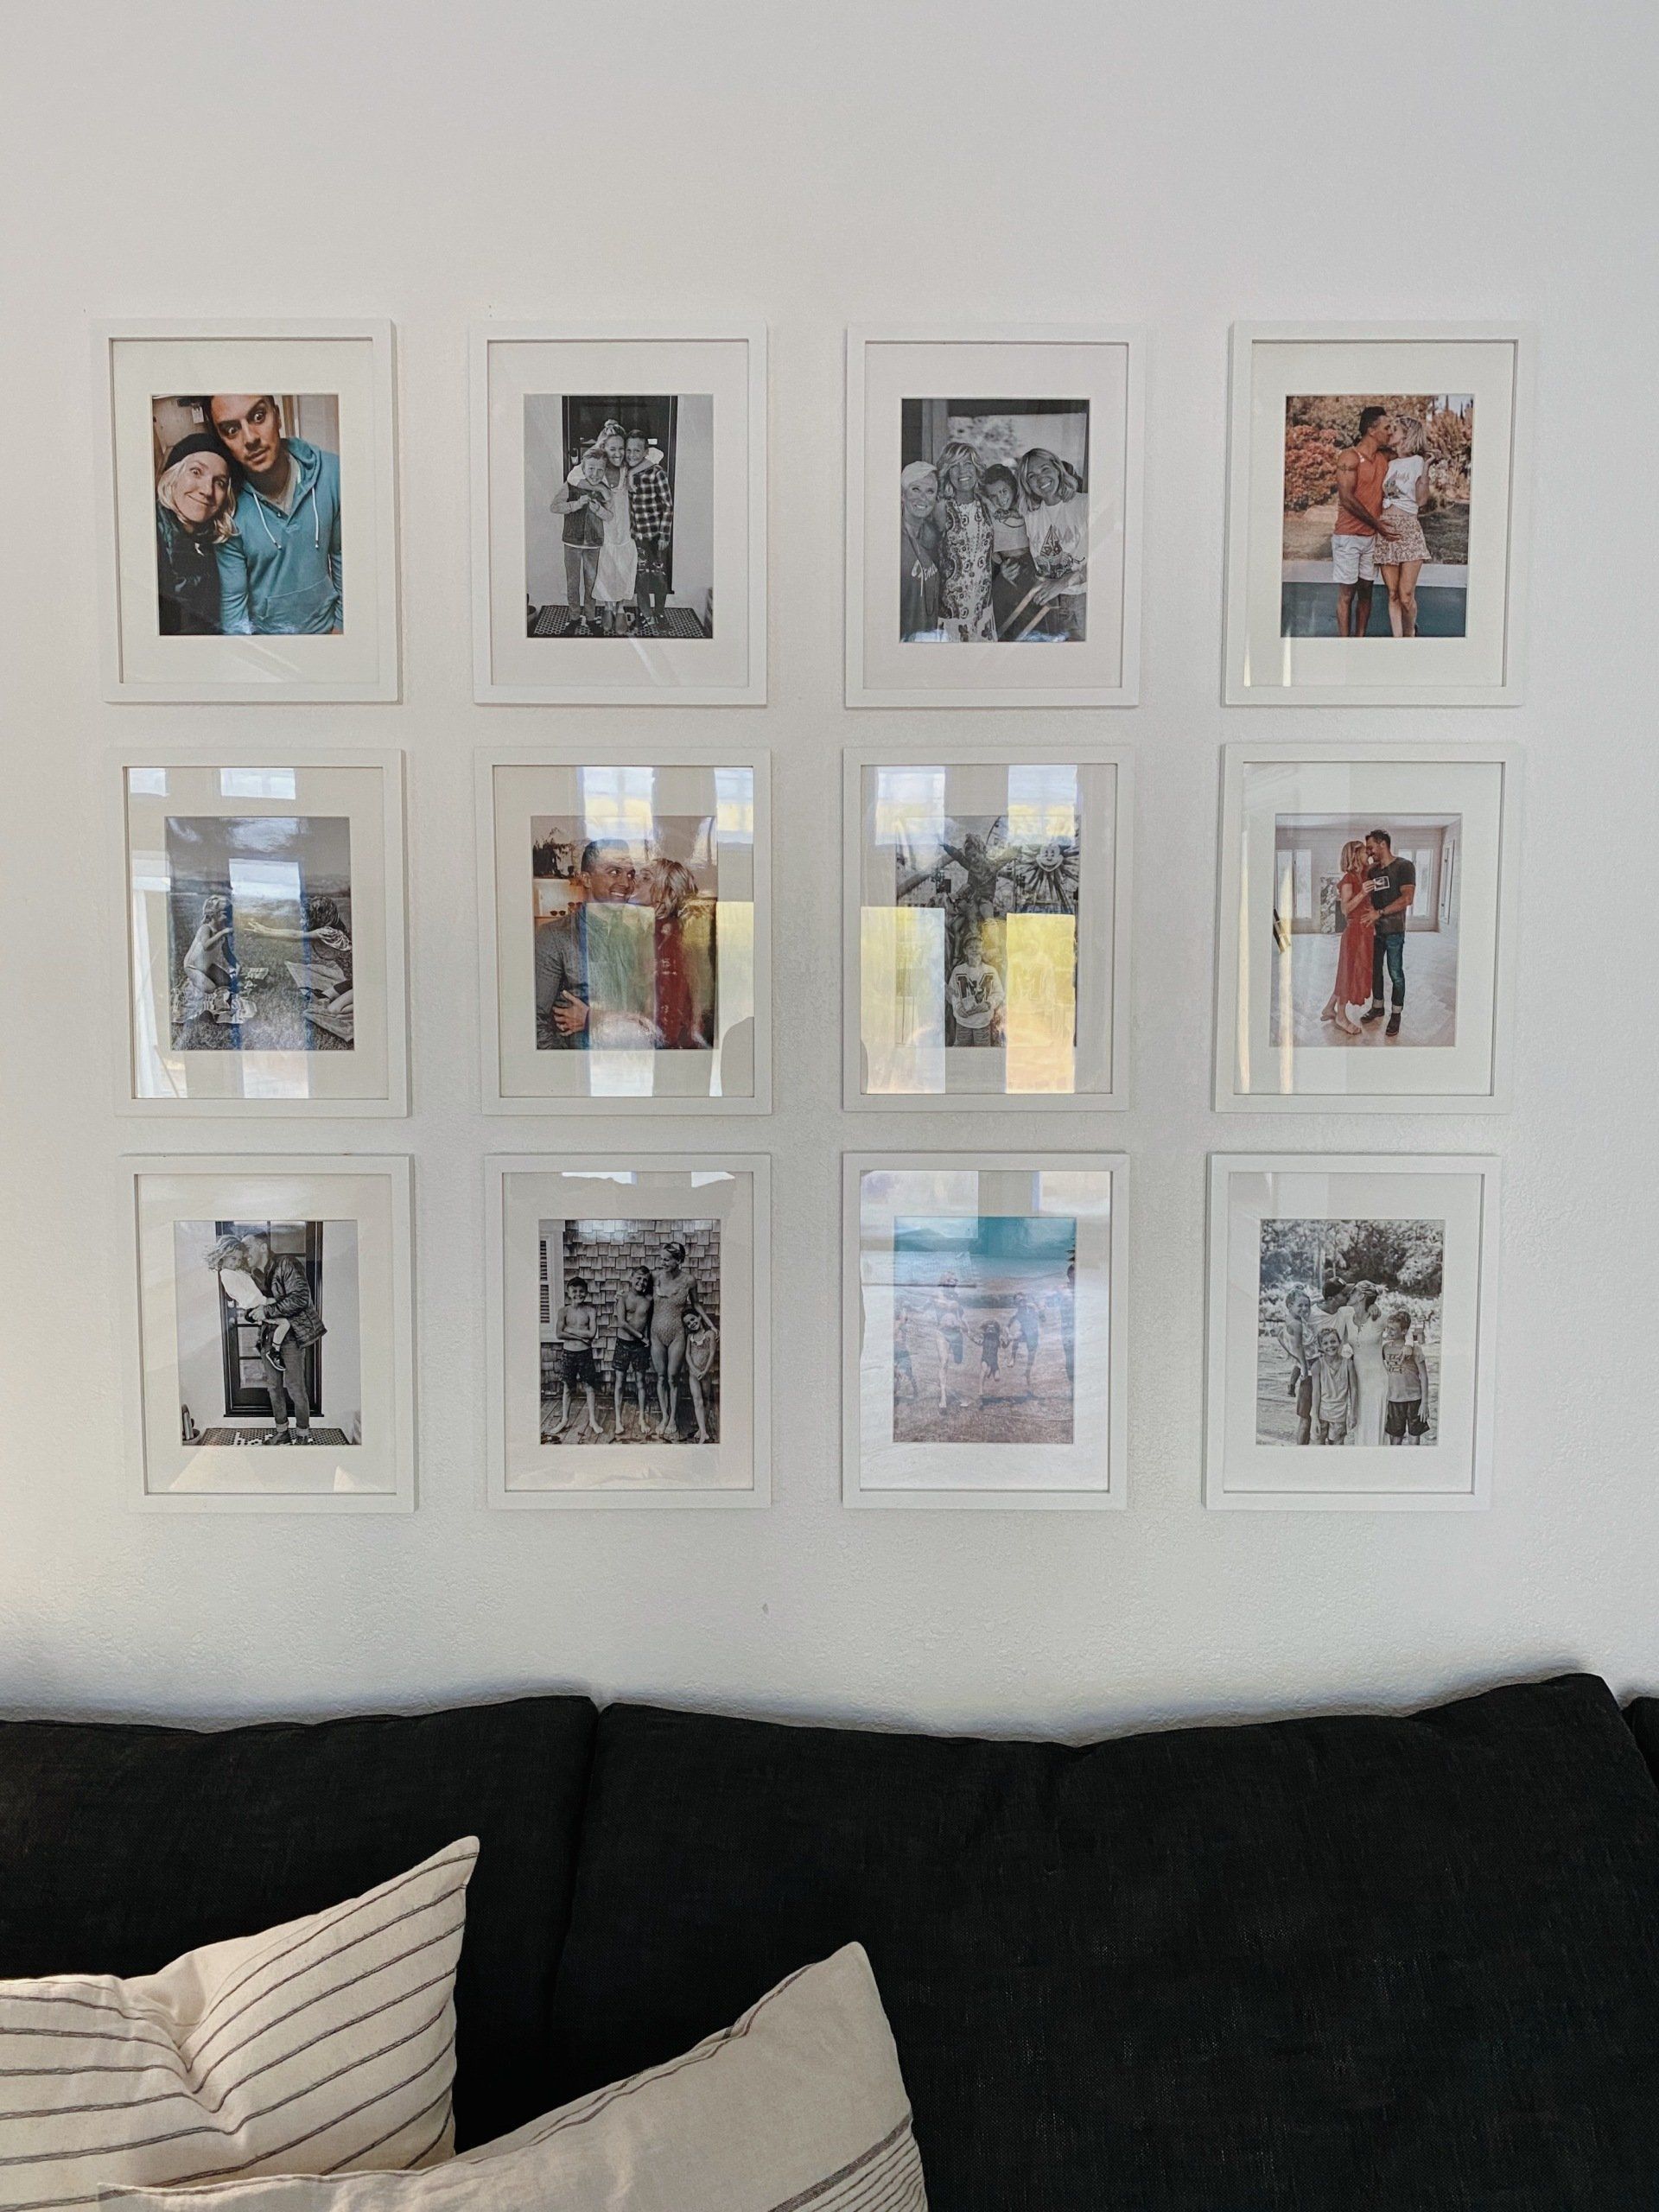
So first up: choose your wall!
Secondly: choose art that makes you happy!
I order all my prints from Costco! They are great quality and you can pick up or have them shipped to your home!
I have my own process for creating a cohesive look for all the pictures but really anything goes as long as the images
bring you joy! I like to use the same filter on each - my go to’s are the Tezza app or Madison Mealy presets, and all
are taken on my iPhone. I love to mix it up with both black and white with pops of color photos - it makes it fun,
unique and personal!
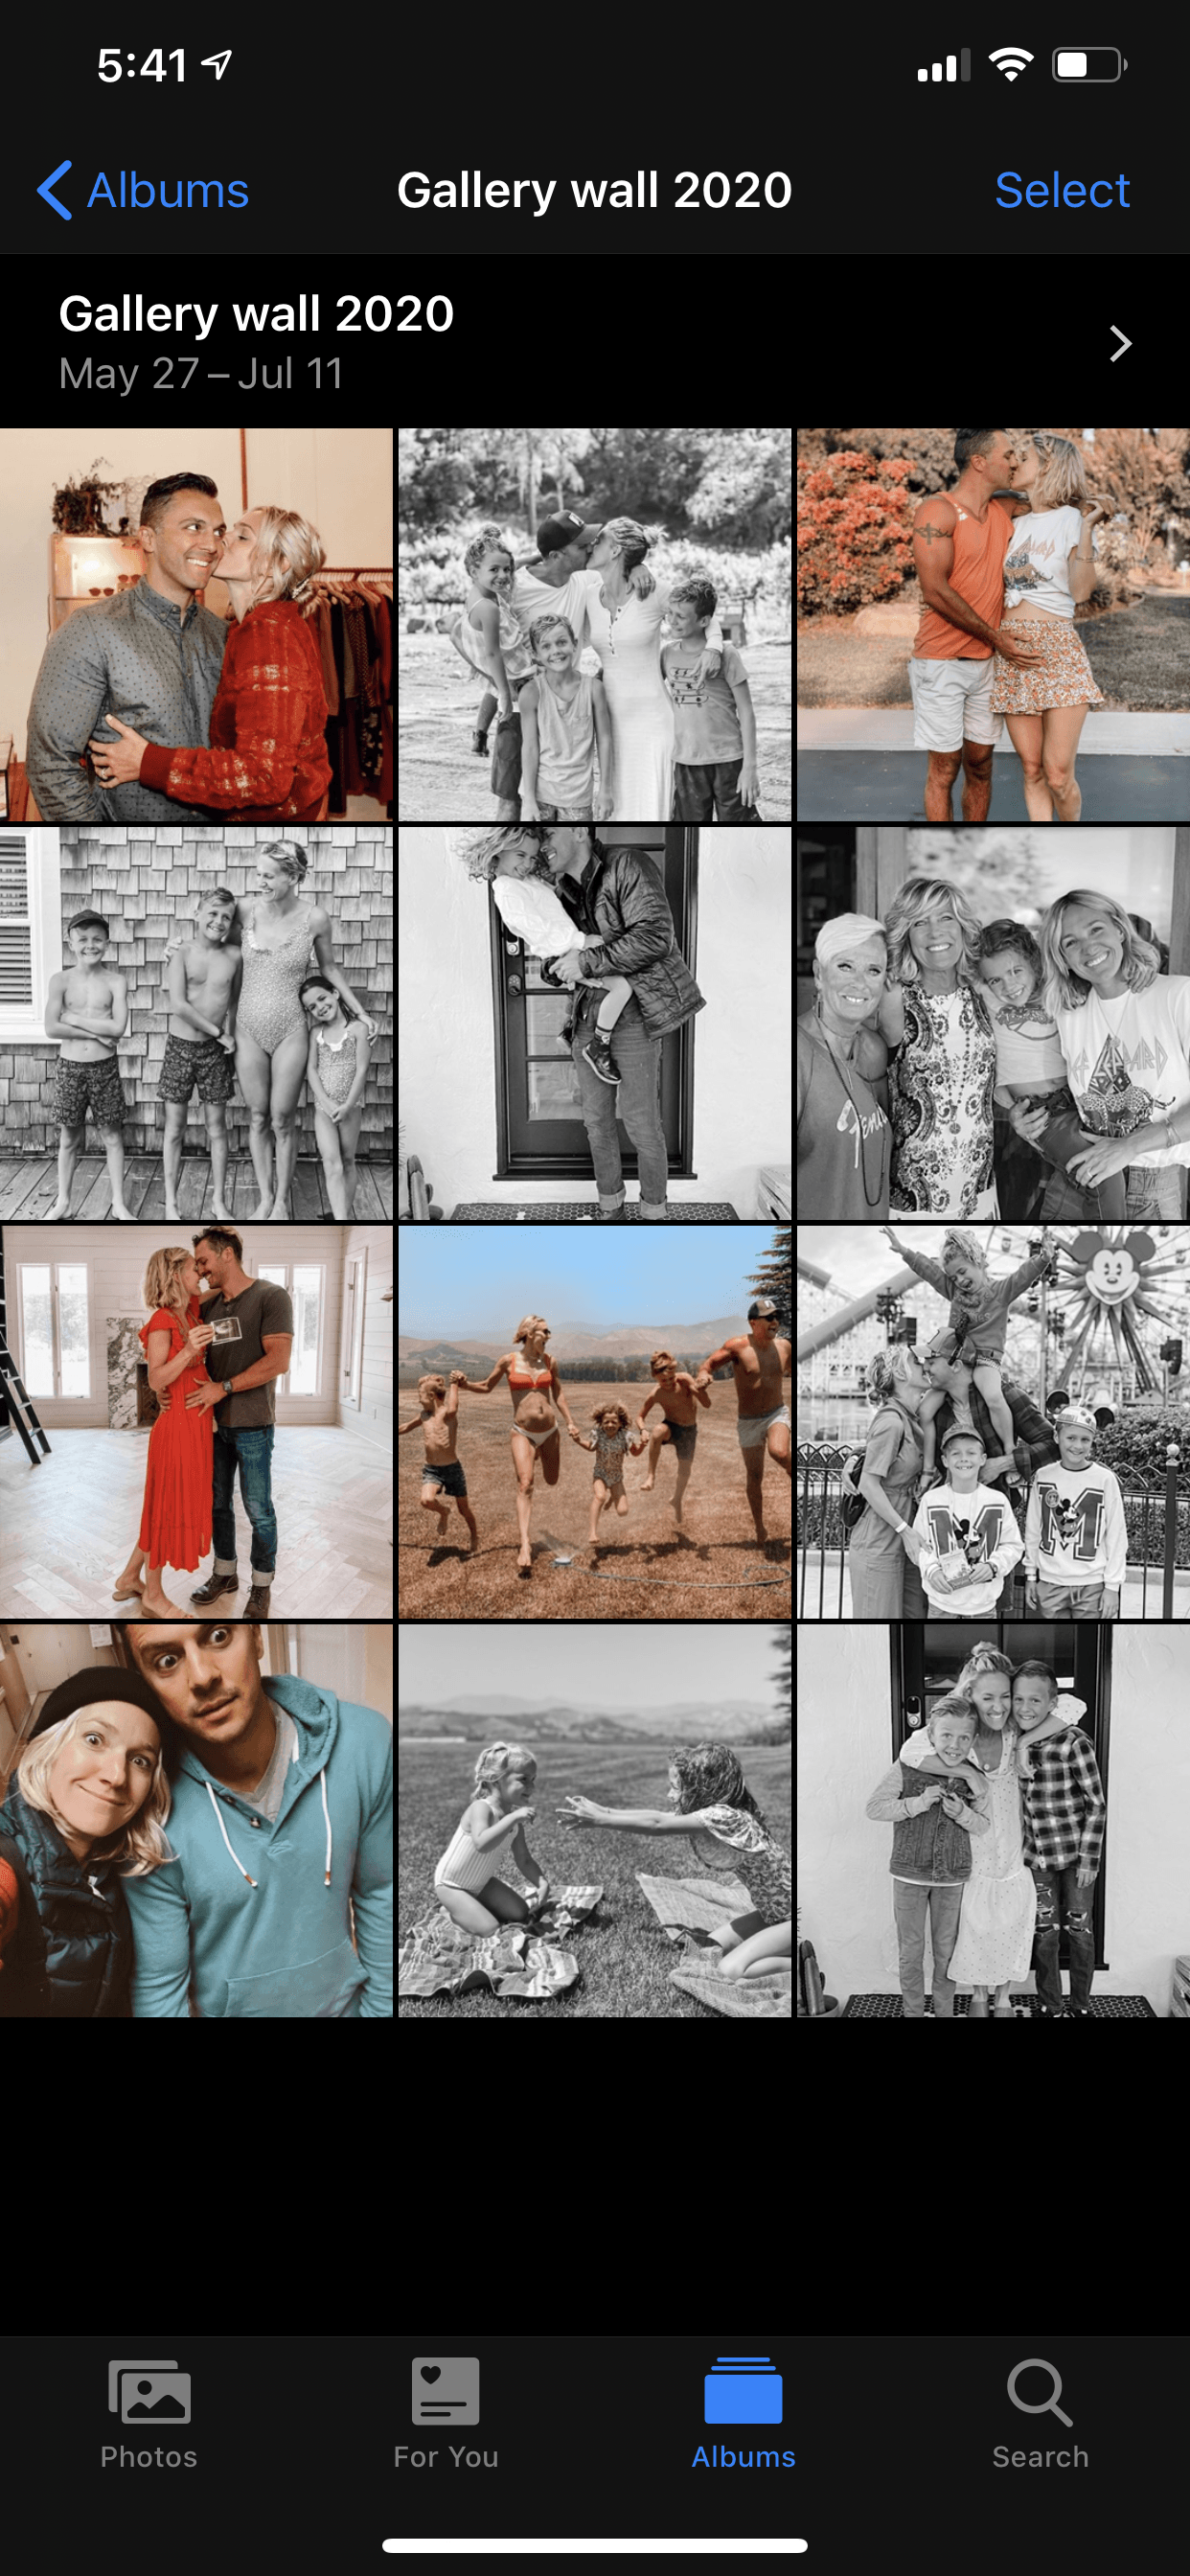
or even just create an album in your phone to move around and adjust to your liking.
You will need:
1. Frames - I get mine from Target
! I buy the Made By Design 11” x 14” frame with 8” x 10”
print - I love these
because they are glass but excellent quality for the price. You can also find great frames at IKEA, but a lot
of times these will be plexiglass - which works for some projects!
2. Tape or Paper for placing your layout
3. Tape Measure
4. Mounting Putty or Earthquake Putty - things move and this just keeps everything in place! It’s easy to
remove with a nail or windex and it’s a life saver! Just a smudge on each corner does the trick!
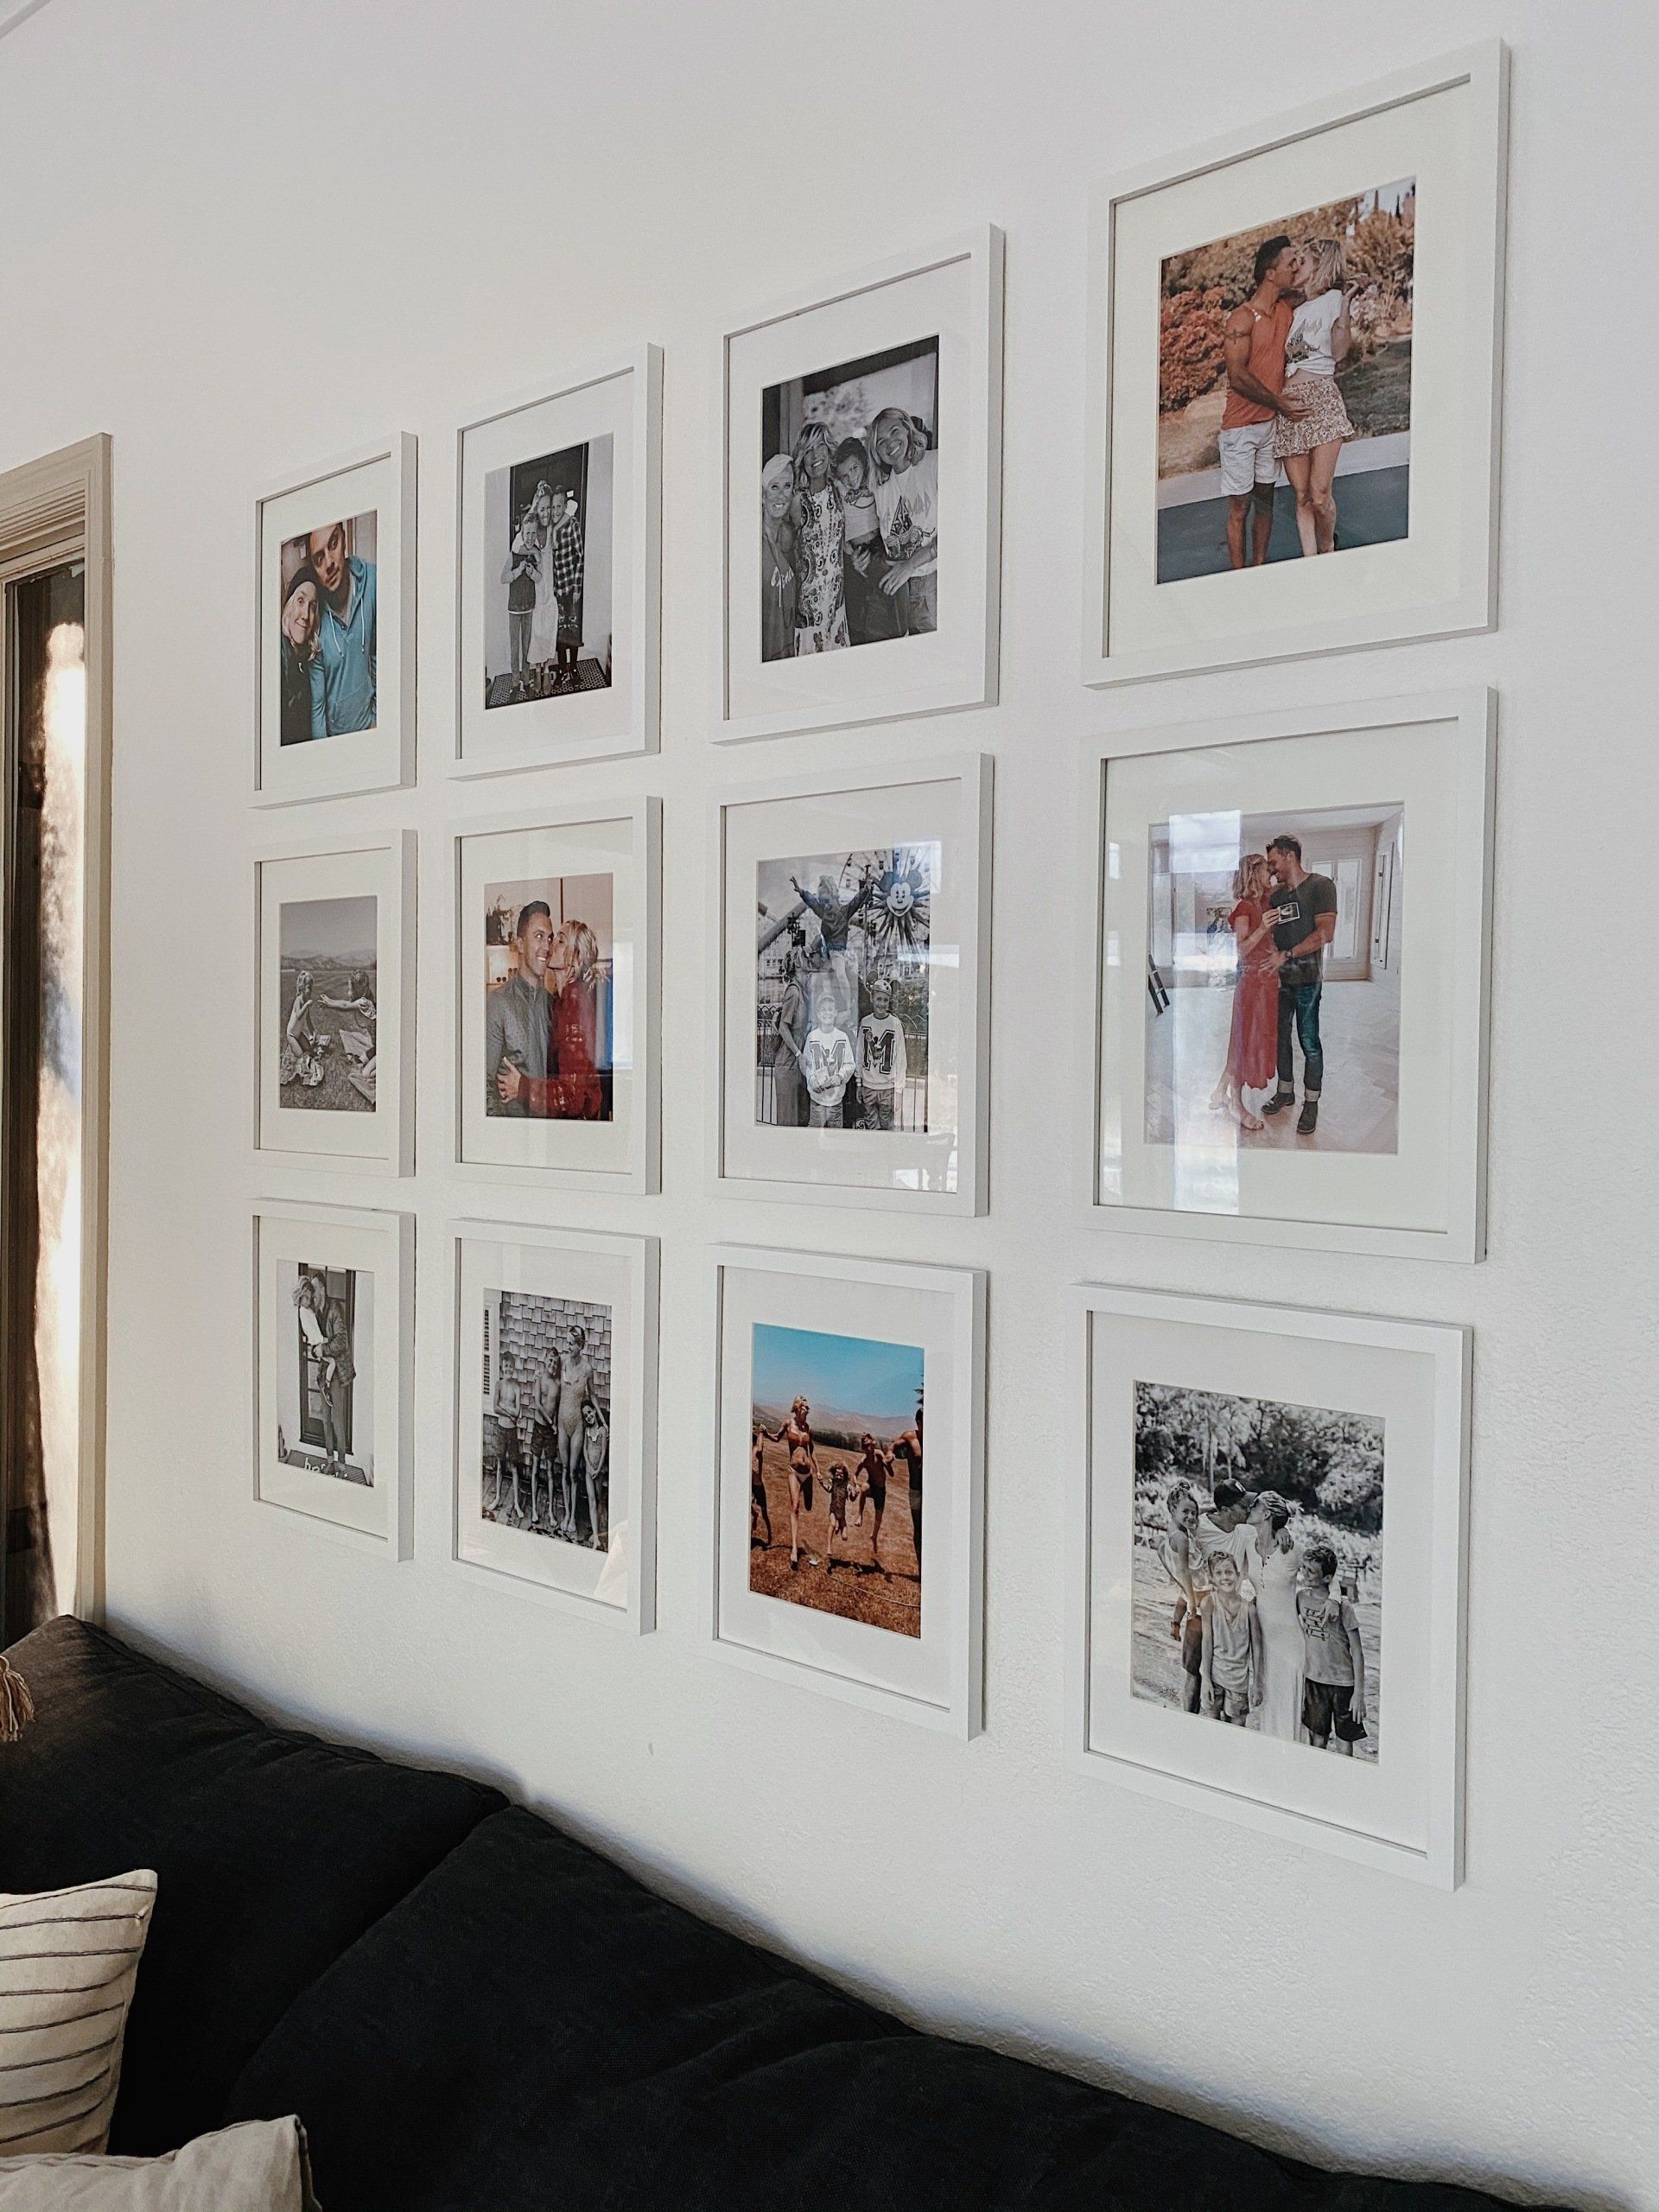
I like to first lay them all out on the ground, in order of placement. I measure out the placement and use but painting tape to mark where each frame will go. I’ve also seen others use paper the size of your frame taped to the wall to mark where to place your nail. Whatever works!
Hammer one small nail and use a smidge of your mounting putty (AKA Your Best Friend) on the corners to secure your frame to the wall. Truly, the mounting putty helps keep everything from movin’ and groovin’ plus, you really only need to use only one nail. There may be space for two, but ain’t nobody got time for that!
Repeat for each frame, sit back and take a look at your handiwork - these memories are sure to bring J O Y !
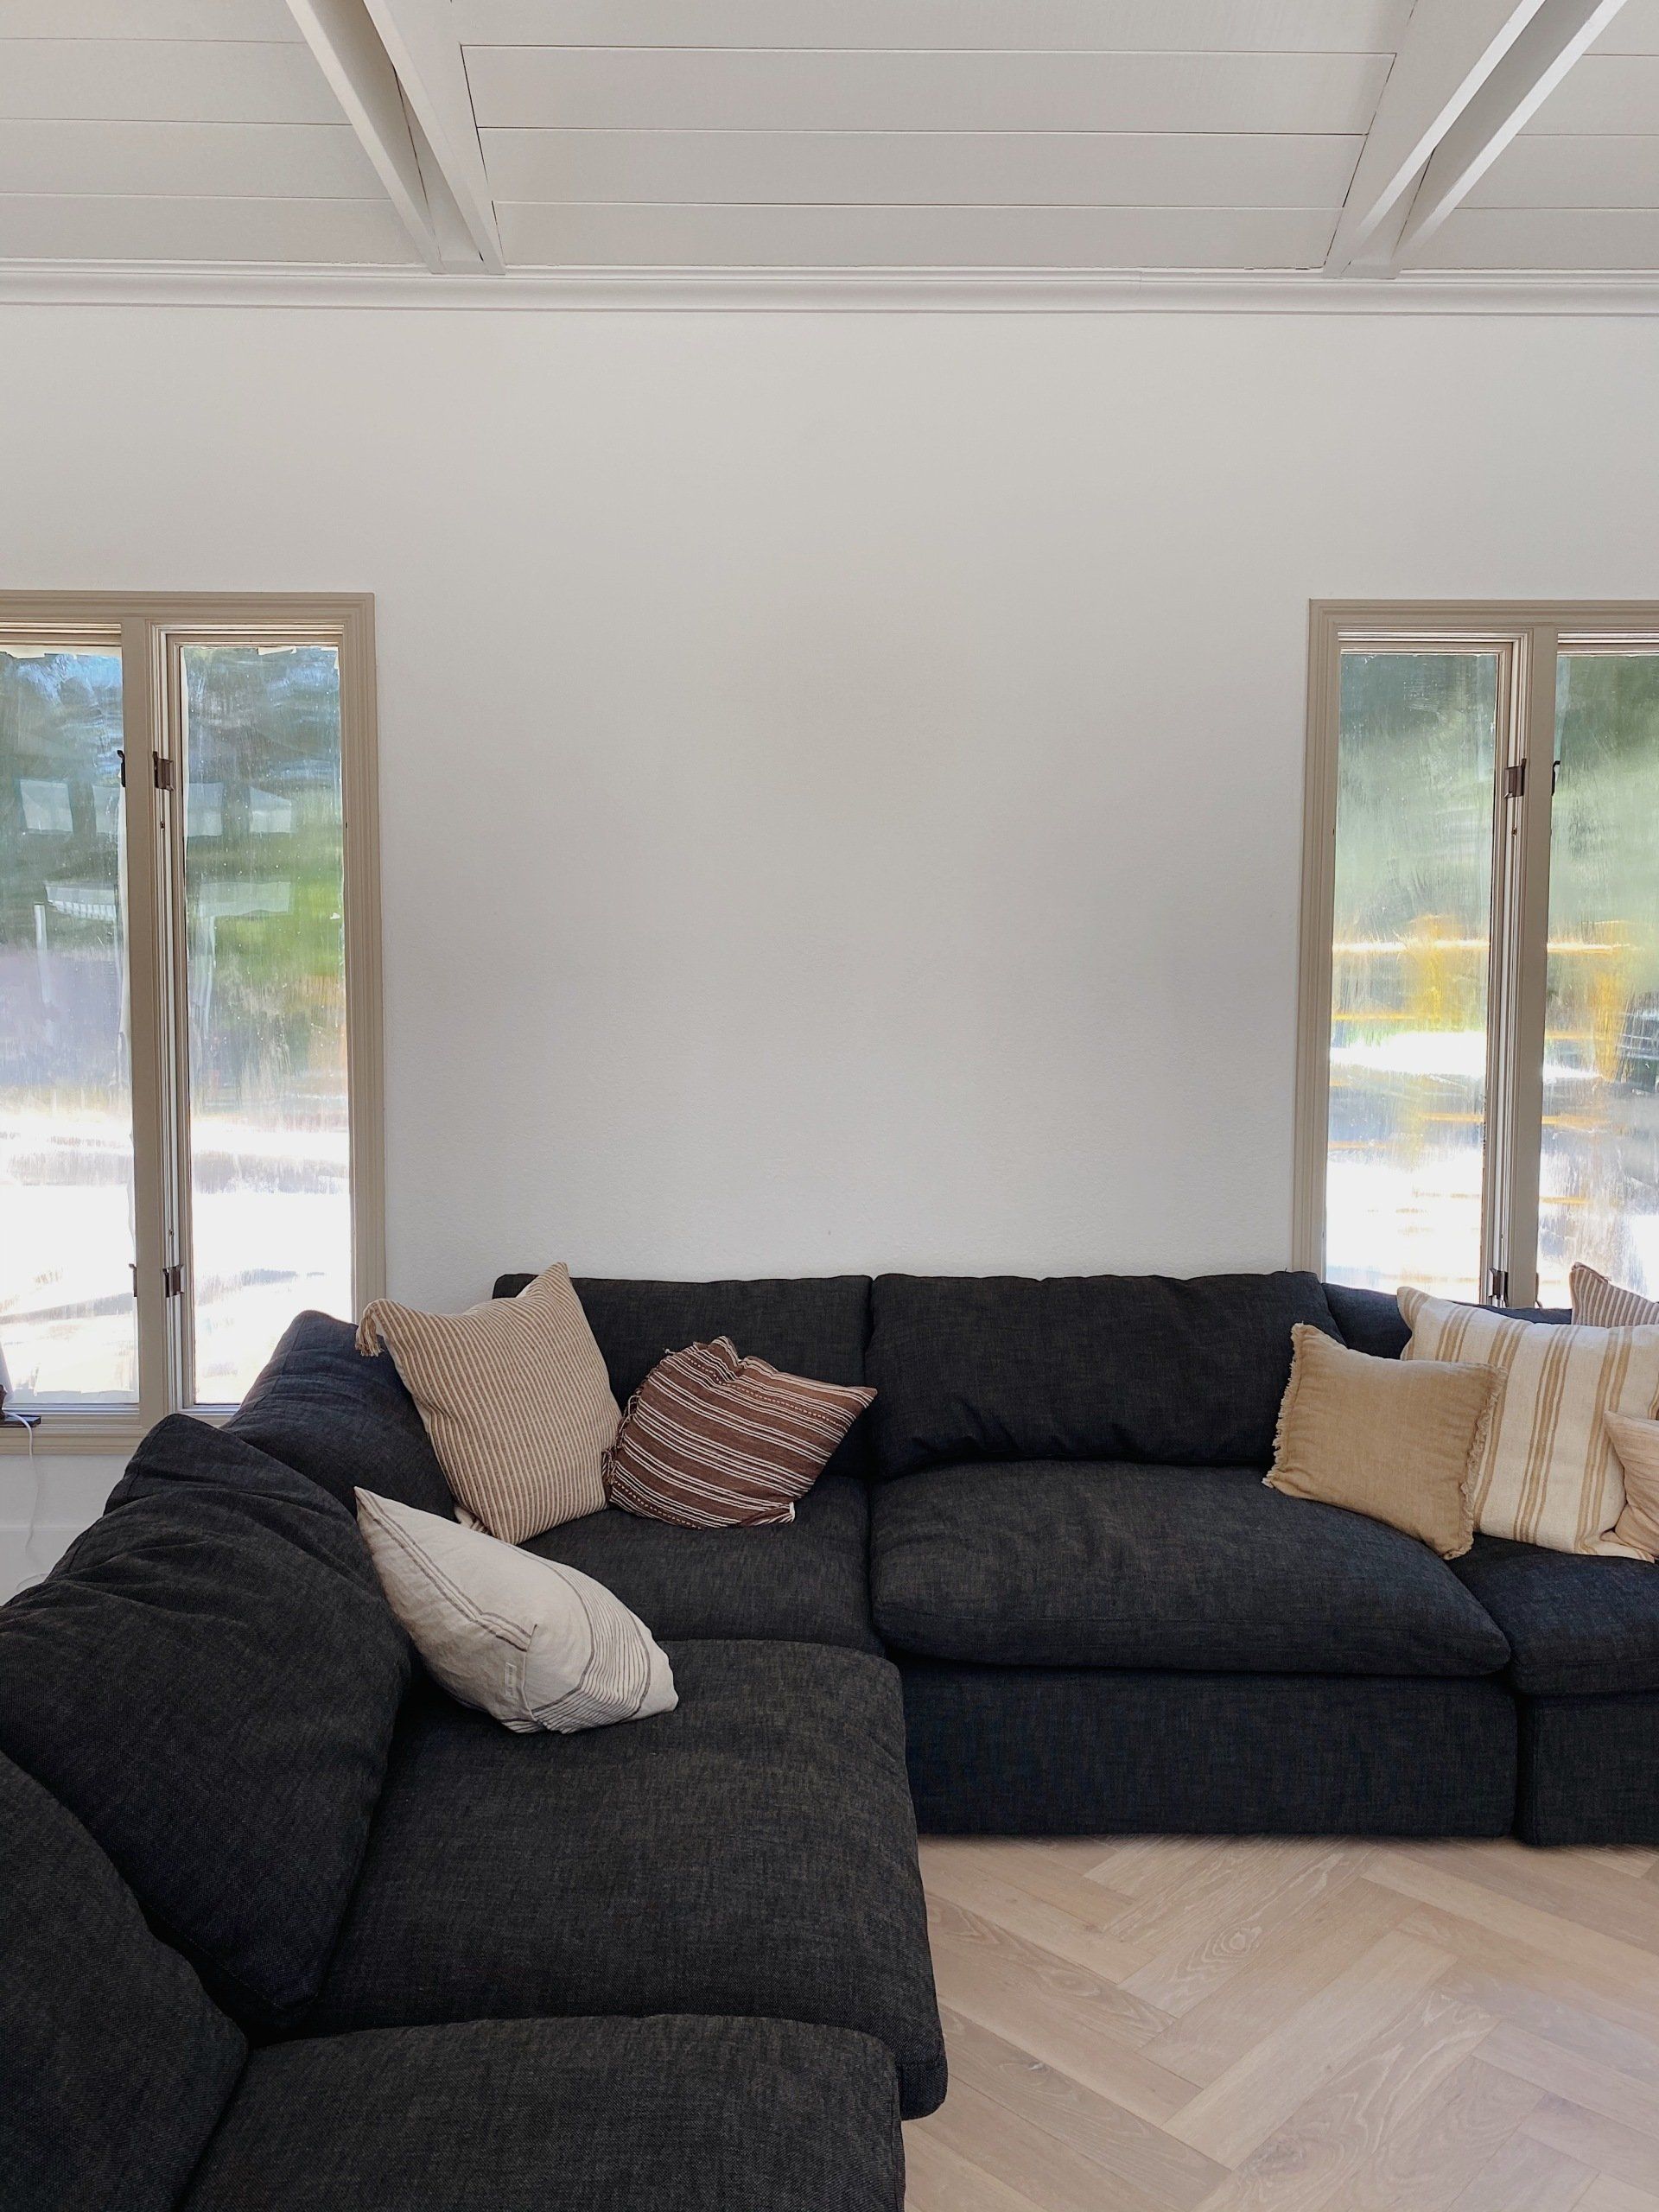
Pro tip from Jenny Komenda: Wondering where to do a gallery wall? She suggests just do one focal wall where the eyes can see as a statement but you don’t overdo it - you just need one in a room!

One Hunnit Percent...The Best Brisket

Christmas Cocktails
So you're prepping for a move...
This yummy pairing is the perfect Fall meal!

We flew to Denver to say what we said before...

It's been a bit since we moved into the new house...